Makati, Makati, Makati

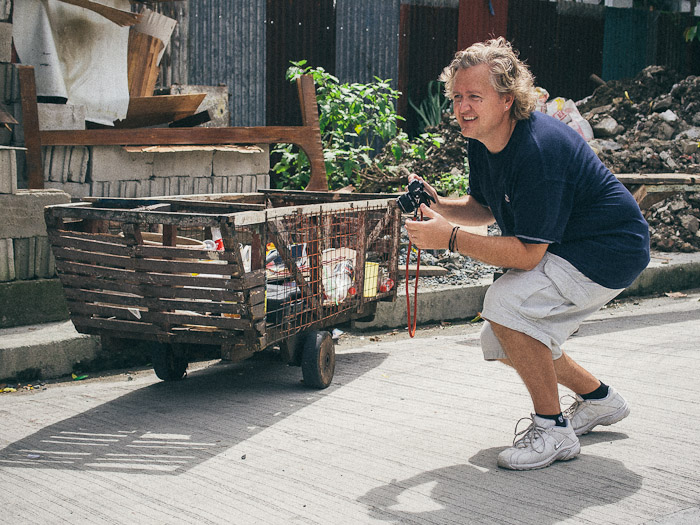
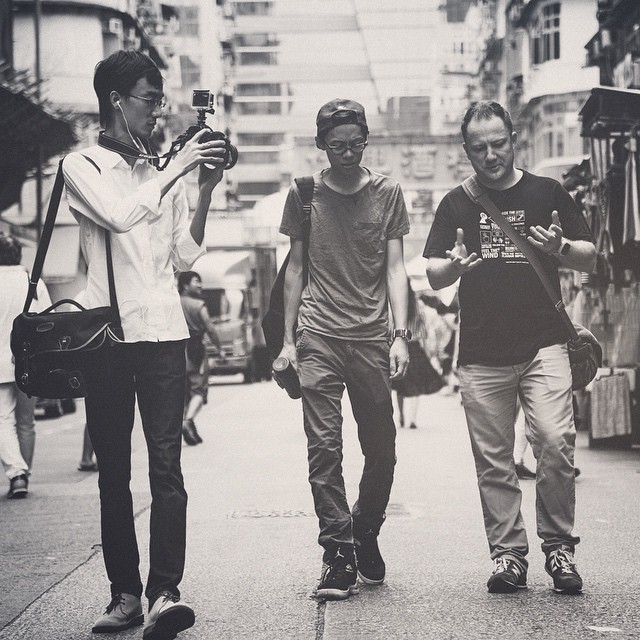
(Kurt Kamka on the prowl on the back streets of Makati, OMD - 25mm)

Some will know Makati as the business district of Manila in the Phillipines....some may know it for another reason - an infamous red light district.....you will find neither of those places featured in this blog post.

Today's post is about two guys just going for a walk down a few streets of Makati, well away from the business zone and suits and well away from the red lights.  I see both those things in Hong Kong on a day to day basis whilst moving around town and I have no desire to feature either of them here, so I wanted to simply show a few images from taking a walk down some completely normal streets just off the tourist map in Makati with my new shooting buddy Kurt Kamka.

I was lucky enough to hook up with Kurt Kamka on this trip who was my trusty guide throughout my few days shooting.  He does some outstanding photography on the streets of Manila and his work can be see at the following links:

1.  Kurt Kamka Blog

2.  Kurt Kamka Tumbr site

Something I have mentioned a few times before and will continue to do so is about using the Olympus OMD camera for this type of photography - in my mind its perfect....simple as that.....both me and Kurt shoot in a similar fashion with this camera, fully utilising the rear tiltable screen as a viewfinder and one touch  shutter release of the screen...it works wonders.  Ironically both of us previously shot with Leica M series cameras but are both finding the Olympus to be well up to the job on the streets (Kurt also still shoots with a Leica S2 camera).

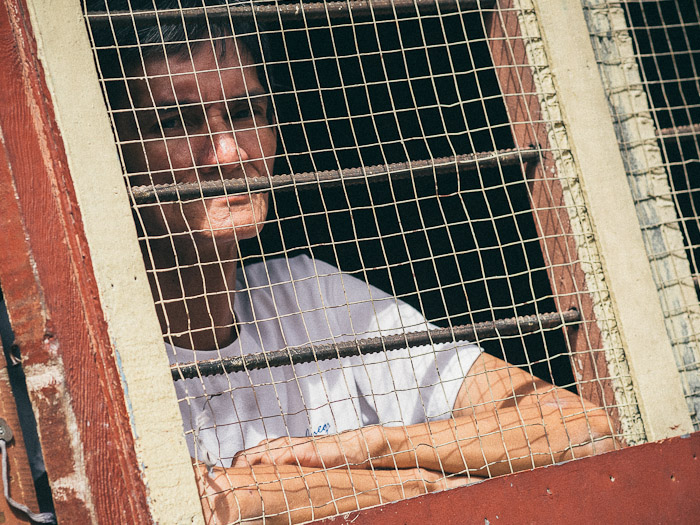
(Brothers, OMD - 75mm)

We had earlier been shooting some people that live at the Catholic Cemetery in Manila (blog post on that featured here) then grabbed some water and headed for another hours walk round some back streets.  These are the images that we captured on that walk.  I am still mesmerised by the colours of the Phillipines, I actually find it hard to shoot in black and white here, as everything has a beautiful 1970s pastel colour tone to it (in my mind at least), which I just want to record all the time with my camera.  Even this little girls blue Ukalele seen below was exactly that, from the clothes to the Jeepneys, the colours just scream out at me.

(Perhaps the warmest smile of the day - OMD - 75mm)

We came across these kids sat in the street playing musical instruments and having a great time together, I stopped to take some photos, help them practice a little bit of English and then scare them with my terrible Ukalele skills...lol.

(Image by Kurt Kamka - The kids weren't familiar with my Beatles and Rolling Stones renditions...lol)

I have never seen so many smiling kids as I have seen here during this trip, a lot of people call Thailand 'The land of smiles'....I'm quite sure the Phillipines could easily win this title also.

(Land of smiles, OMD - 75mm)

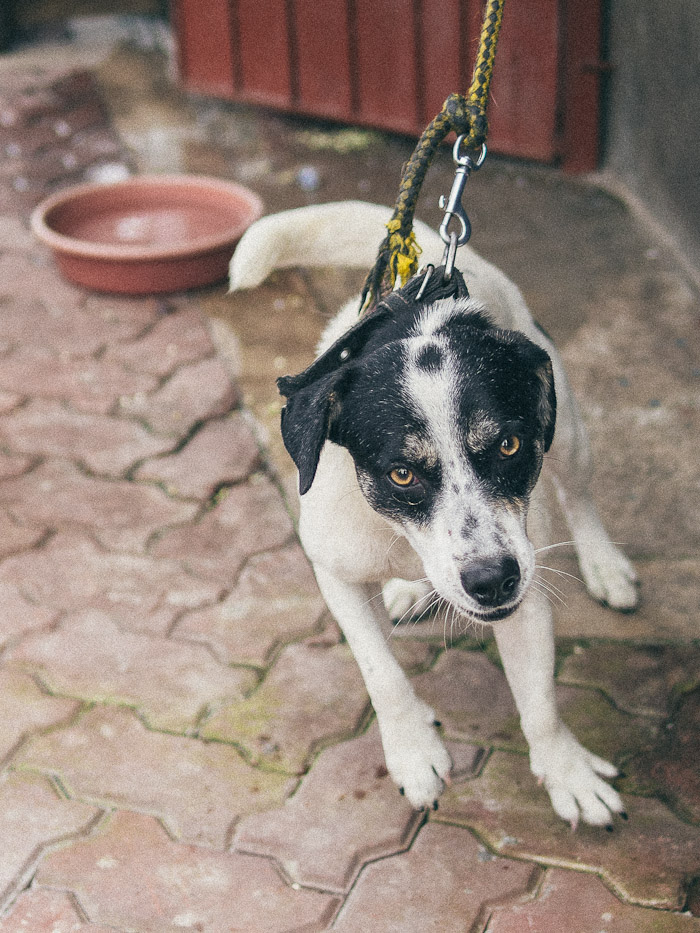
There were also plenty of animals to be found along these back streets, I saw a lot of cockerels tied to doorways, and Kurt explained to me that these were used for 'cockfighting', a viscious sport I imagine which seems to be very popular here and in many other parts of Asia.  I also encountered a vicious dog or two, luckily tied to a post, and probably the skinniest cat I have ever seen!

(Who let the dogs out?, OMD, 25mm)

('Ma-Cat-i' in Makati, OMD - 25mm)

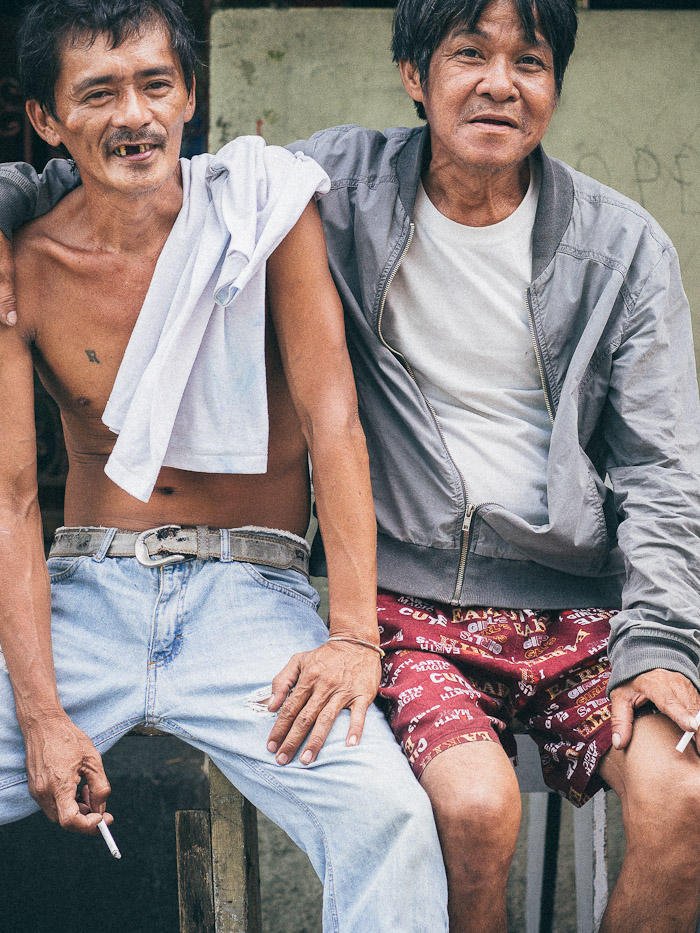
As well as the young kids in the street we met plenty of elder folk who were equally as nice and pleased to meet and interact with us as we wandered through their neighbourhood.  Of course we had a few funny looks at first, but with big smiles and friendly gestures, every single person we met was more than happy to be photographed.

(Friendly gentlemen in Makati, OMD - 75mm)

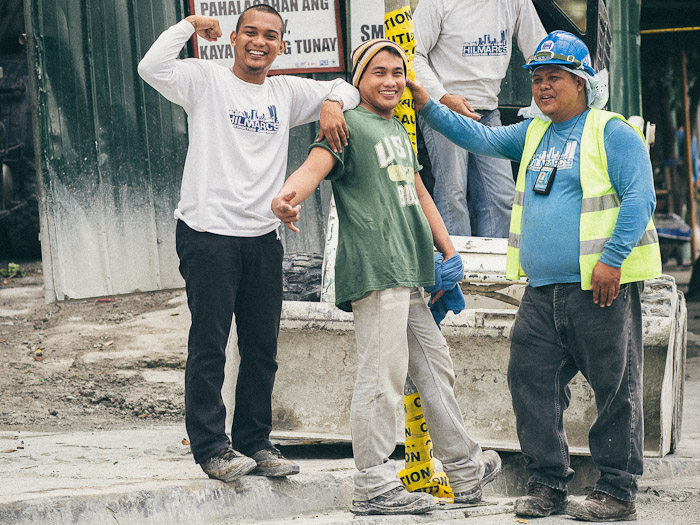
On our way out of the back streets we came across a building site, where some workers were hanging around outside on a break, they stopped us in our tracks and insisted that we photograph them.  The Fillipinos just seem to LOVE being photographed at every opportunity.

(Pinoy smiling builders, OMD - 75mm)

As we finished our walk the heavens opened and poured down, so it was time to jump in a cab and head back for a coffee and some editing.  A succesful day was had by both of us and a great first meeting.  On the way back to my hotel I was reminded of the poverty that of course exists here as beggars tapped on the taxi window asking for money, I am never sure what is best in this situation, does giving them money keep them on the streets...i guess so...but its always a hard call for me...

(Begging at the roadside - OMD - 12mm)

The following day I found a photography paradise in a part of town called 'Pembo'.  I am currently editing my images from that location and will do my next blog post on that once I arrive back to Hong Kong tomorrow afternoon.  Please be sure to come back for a look as there are some great characters featured in those images and if anyone reading this has any desire to photograph life in the phillipines, I strongly recommend visiting that place.

All images here are shot on the Olympus OMD with various prime lenses and all processed with 1-click presets fromVSCO film presets, still by far my favourite film simulation filters that work directly as a preset within Lightroom 4.

For other posts I have written recently with images of the new Olympus OMD in Manila please see the links below:

LINK TO BLOG POST: Residents of Makati Catholic Cemetery

LINK TO BLOG POST: OMD goes to Manila (first trip in July 2012)

LINK TO BLOG POST: OMD shooting in Ulingan, Tondo, Manila

Thanks for taking the time to visit our blog, if you like our blog and website, please ‘like’ us on our public Facebook page and share this story with your friends with the Facebook and twitter links below.  You can also subscribe to our blog via the RSS link below.

F8 Photography provides commercial photography and photography and video training workshops, more details can be found via the ‘courses and workshops’ link and upcoming events via the front page of our website.


Olympus OMD goes to Cambodia

(Gary in the railroad village with the locals outside Phnom Penh with OMD and Mamiya 7ii)

So here we are again, back to the glorious backdrop of Phnom Penh, Cambodia, this time bringing a different camera system - The Olympus OMD for a 4 day field test.

This blog post is not an all out review of the camera system, I'm not a techno-phobe, this is a real world usage review and highlights of my thoughts on the camera system in a fast changing environment and for close up street and travel photography...you won't find any MTF charts or detailed lens analysis....just images that I shot and my thoughts on them :-)

The last time I visited Cambodia I shot only the Leica M9, as I had shot here several times with full Canon DSLR systems and wanted a smaller rig to shoot travel photography with, and the Leica was a perfect fit...albeit the seriously expensive option.

The Leica system is hard to beat (some say impossible), so the bar was set very high, I have achieved some fantastic results with my Leica M9, therefore I already had an unfair comparison level in my mind...but I thought if a camera is going to succeed in 2012 and beyond, it needs to raise the bar and match some of the already outstanding options available to us.

With this in mind, I wanted to test some other rigs out to replace my Leica rigs for street photography and lightweight travel photography.  I had tried the Fuji XPro-1 a few months ago, and have written some positive thoughts on that camera system, but after extended use I must admit I found the autofocus to be a little slow and inaccurate at times for my liking, even though the image quality was great.  Therefore that camera was moved on and I was back to using Leica again.

Anyway, the only remaining system that attracted me was the new Olympus OMD, with a selection of the already proven prime lenses available from Olympus and Panasonic.  So the day before we flew to Cambodia I picked up a kit, camera, grip, 12mm f2, 20mm 1.7 and 45mm 1.8.  I figured this should cover most of what I need, and I tend to shoot a lot very close up, so I assumed the 12mm lens (24mm equivalent) would be spending most of its time on the camera.

One of the features that I was initially unsure of with the Olympus OMD was the touchscreen for shooting....At first I thought this was a bit of a gimmick, as I'm a traditional style photographer who likes to look through a viewfinder (I don't care much for EVF either....), so I didn't think I would like the touchscreen feature, especially for shooting.

However, I am a changed man, the touchscreen shooting feature - the ability to compose, focus and shoot almost instantly using only the screen has completely revolutionised the way i shoot with this type of camera.

(using the touchscreen to shoot...image shot below)

I learned the cameras menu systems, and setup it all up how I wanted on the 2 hour flight from Hong Kong to Phnom Penh, without the manual (I never read manuals), so that was easy to do, this helped me warm to the camera once I had it all set up how I wanted, disabling a few features, and programming others to the function buttons to suit my needs.

(First image I took on the OMD, 12mm)

This first shot above was the first time I had tested the touchscreen, which allows you to literally just press wherever in your composition you wish the camera to focus and then shoots....this happens almost instantly, so its a great way to capture a scene or a portrait without having to raise the camera to your eye...its kind of like shooting using zone focussing from the hip...except you take away all the problems that method has (misfocus, composition issues, etc), so in reality this could be the perfect street camera for me.

Because there are very few cameras with this technology currently, I believe that nobody at any stage during my trip there actually had any idea what I was doing when I was shooting in this way....even if I approached them and requested to take a picture, once I was done they would still stand there waiting for me to start....I like that, as then I can capture a more natural image with no barriers.

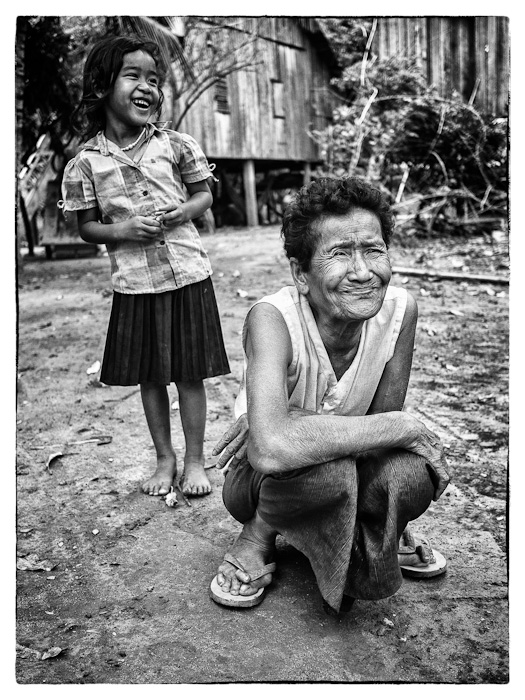
(local villagers on Silk Island, 45mm) (elderly lady on Silk Island, 45mm)

Using the longer lens (45mm - equivalent to 90mm) was also great fun, as I had the same control as with the wide lenses to capture tight portraits without having to raise the camera.  Another thing that has amazed me, having only used this system for 2 weeks now is how sharp the lenses are.  I am used to Canon gear for work, which is great...and Leica gear for travel/street which can be phenomenal if you get the right lenses....however...in all honesty for the price of these lenses (some as low as only a few hundred US dollars) their performance is amazing...I couldn't ask for sharper images, and that coupled with super fast and super accurate autofocus...i just love this camera more every time I pick it up.

(school kid hiding under a desk, 45mm)

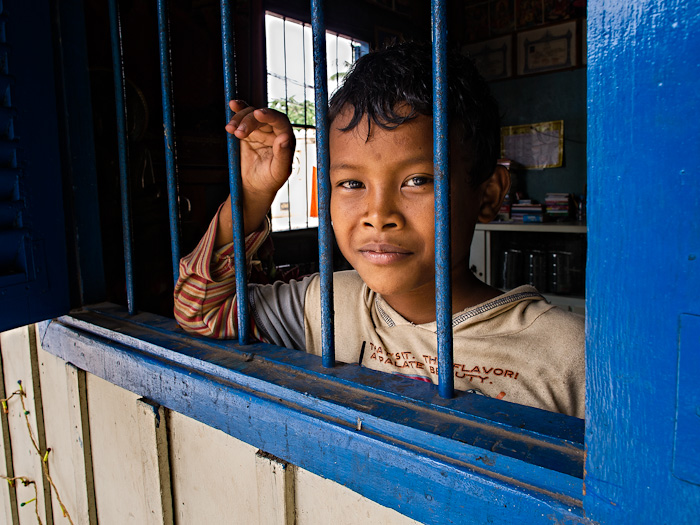
(local school in Phnom Penh, with super friendly staff and kids, 45mm)

However, as mentioned earlier, I am happiest shooting close up with a wide lens (normally a 24 or 25mm lens, so the Olympus 12mm (equivalent to 24mm) was always going to my new best friend on this camera, and to be honest, this lens was the reason I bought the system in the first place...).

Below are a further selection of images I shot there over a 4 day period with the various lenses.  I think as this was the first week I had used the camera, I was more than happy with how it performed and the quality it produced.  The main thing is that I haven't missed using the Leica, despite it being my workhorse camera for the last several months....this tells me something....I'm not saying one is better than the other, as I still think the Leica M can produce amazing photographs, however if you want a system that can give you a lot of the portability and loads more technical gucci features than any Leica....and you don't want to remortgage your house to afford the system....then maybe the OMD is worth a very serious look.

(using touchscreen again and getting nice and close with the 12mm lens)

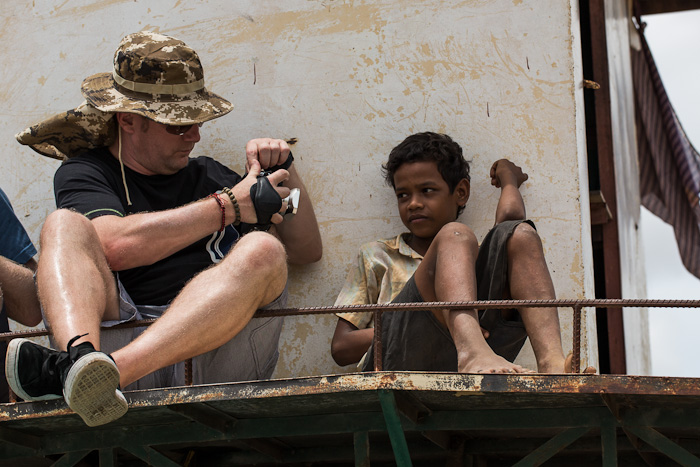
(on boat roof on way across the Mekong River, 12mm)

(children on Sisowath Quay, Phnom Penh, 12mm ISO 6400) (sleeping child, railroad slum, 12mm)

(railroad slum, Phnom Penh, 12mm)

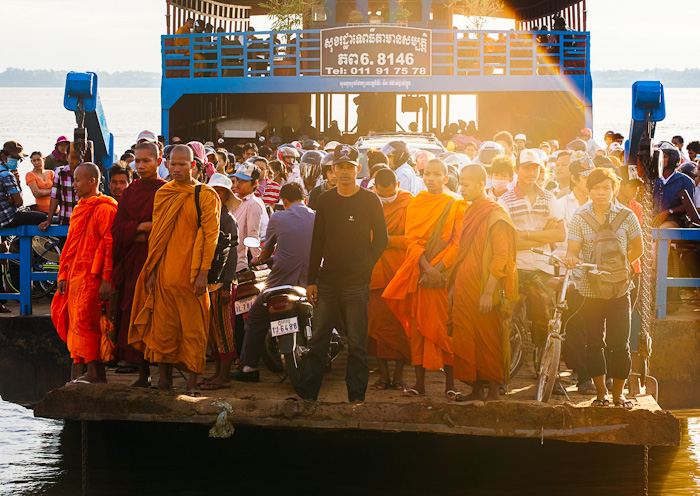
(monks at the riverside, 12mm)

(Pagoda Boy, 12mm)

(Rush hour, early morning, 45mm)

(villagers on Silk Island, 20mm)

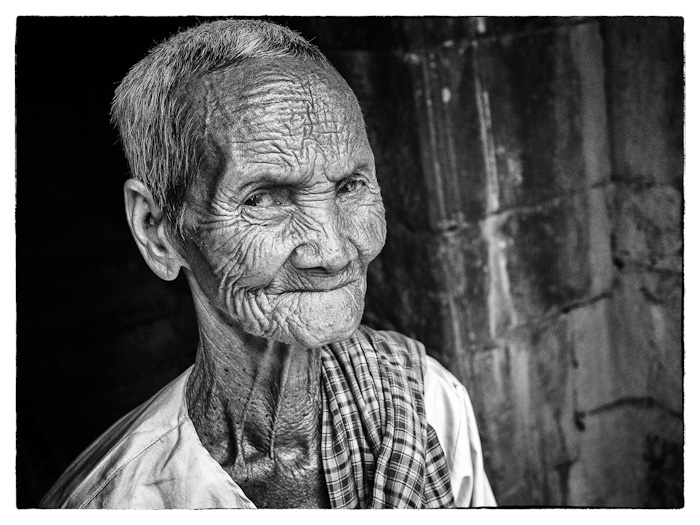
(102 year old female temple minder, 20mm)

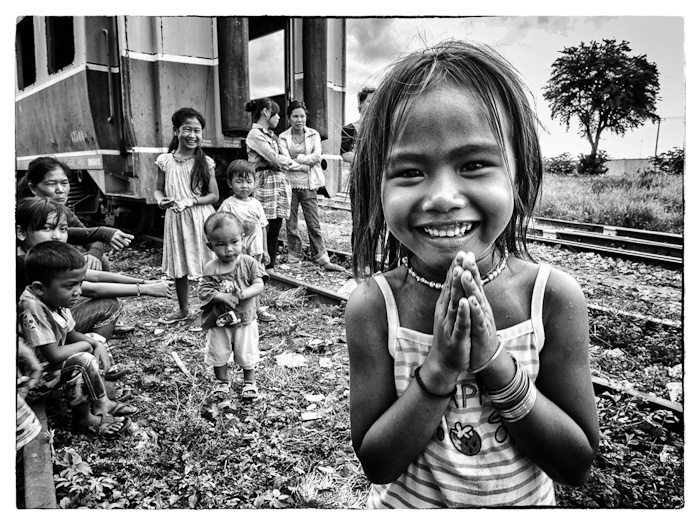
(railroad slum kids, 20mm)

(railroad slum kids, 12mm)

(railroad slum kids, 12mm)

(railroad slum kids, 12mm)

(Our little gang of photographers, L to R: Giles, Steve, myself and Dave, 12mm)

Guest blog posts on this trip from Steve who accompanied us can be read here:

Guest blog posts written by Dave who also came along can be seen here:

Thanks for taking the time to visit our blog, if you like our blog and website, please ‘like’ us on our public Facebook page and share this story with your friends with the Facebook and twitter links below.  You can also subscribe to our blog via the RSS link below.

F8 Photography provides commercial photography and training across Asia, with workshops on Street Photography and other photography and video training courses, more details can be found via the ‘courses and workshops’ link and upcoming events via the front page of our website.

Vibram HK100 Ultra-Marathon Event

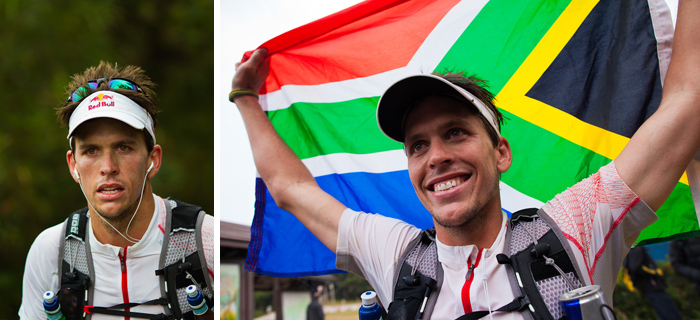
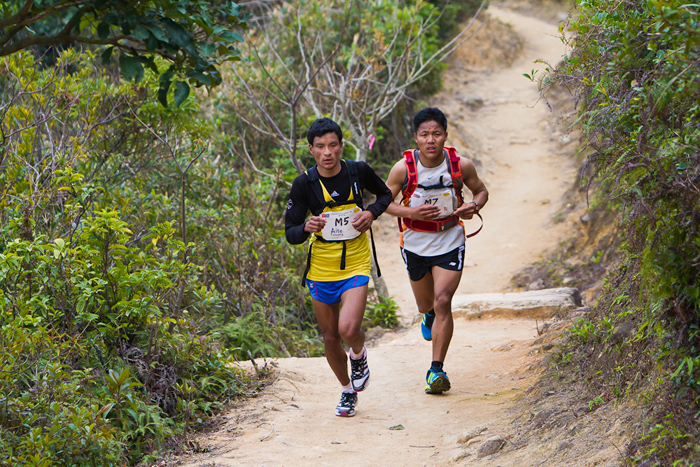
It was 4am on Saturday morning....the alarm clock was ringing loud....it was time to get up, travel north to the mountain areas of Northern Hong Kong and get ready for a very very long day of shooting the HK100 ultra-marathon event.  27 hours later at 7am the Sunday morning, we finally stopped shooting and packed up our cameras, having shot over 2000 images, and headed home for what we thought was a well earned sleep!  Of course our task was nowhere near as difficult as the participants, who had to run, walk and crawl 100km across some of Hong Kong's infamous peaks and trails, with a total elevation change that equates to twice the height of Everest! (Ryan Sandes - Winner HK100 2012 in a new record time of 9hrs 55 mins!!)

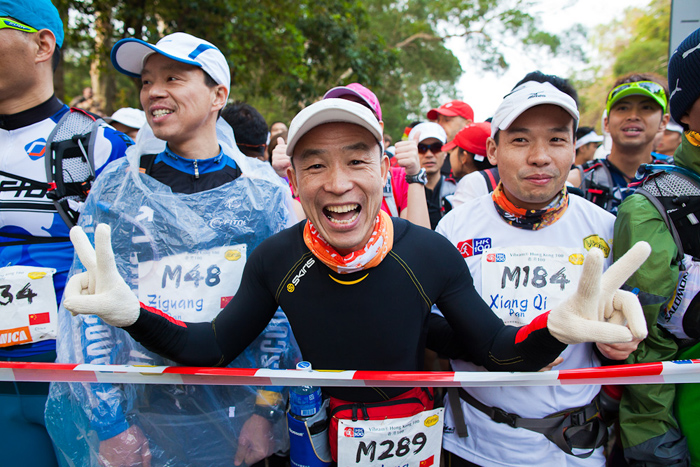
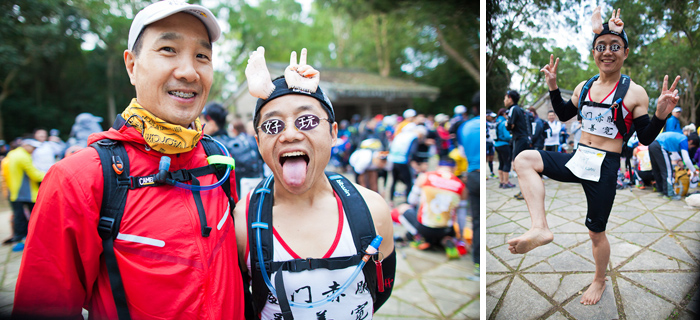
Our job was to record the action, the drama, the emotion and the glory of the event, and we hope we have done so to the best of our ability.  We would like to share a few of our pictures here so you can see the diversity of the participants, their pain, their pleasure and really just an overall amazing experience for everyone who took part.  We started off as expected at the start line, capturing the pre-race nerves and party-like mood of most of the participants, which was great to see, given the fact the next 24 hours of their lives was going to be painful!

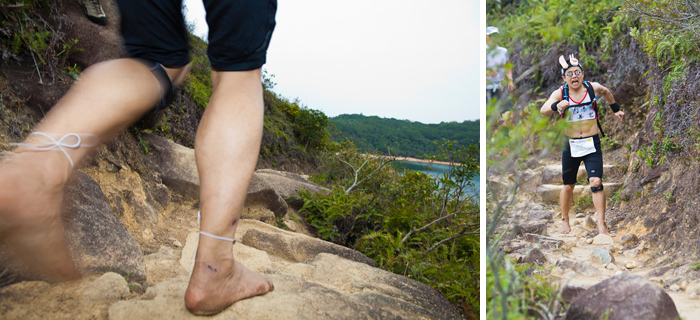
(this guy on the right about to run 100km across rocks with no shoes on?!? Must be crazy!)

We were astonished to find one runner who was doing the event with NO shoes....and even more amazing was the fact that he was among the front runners as we travelled around the course! Here's some images of him in action at the 36km mark...as you can see from his facial expressions, I'm sure he would rather have some nice running shoes on...haha....we have to applaud his courage...or is it insanity?!

(slow sync flash with the Canon 5DII and 24mm mark II prime lens)

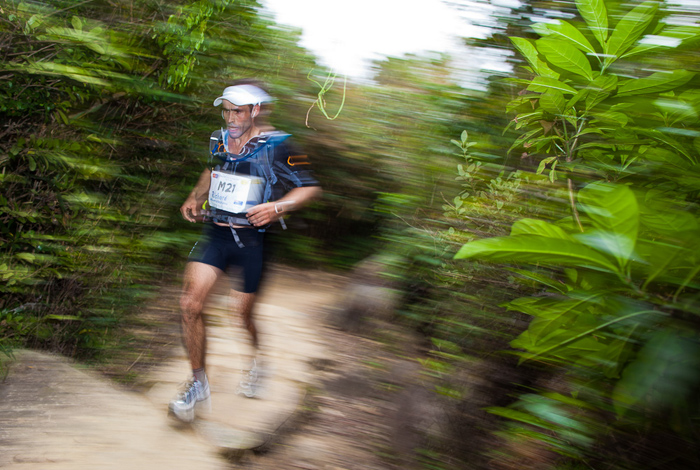
We used a combination of Canon 5DII's with wide prime lenses and slow sync flash to capture close up action as well as a couple of 7D's and long lenses which were perfect for sports with their fast drive and autofocus.

(the two Nepalese runners who led the way for much of the race, eventually coming 2nd & 3rd)

The course was extremely well marked and manned by the hundreds of volunteers, with checkpoints being very welcome breaks for the athletes, and a good opportunity for refreshments, fixing feet and catching up with loved ones.

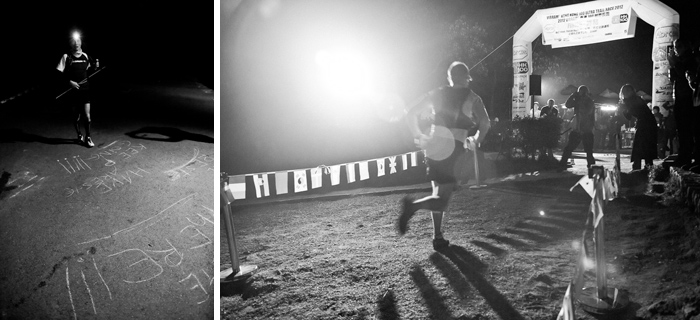
(smiles all the way to the finish line)

Every part of the course we covered, people were ecstatic, smiling, screaming and thoroughly enjoying the experience...to be fair, at the finish line most people were much quieter by that stage having spent a very long day and night on the hills.

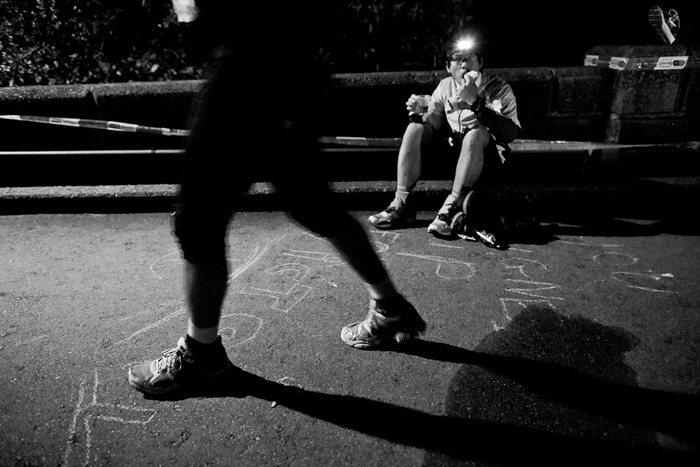
(high ISO in the middle of the night - no problem for the 5D mark 2)

The Canon 5DII again came into its own during the night, with its great high ISO performance, allowing us to capture some nice moody black and white images lit usually only by headtorches and the occasional lamp.

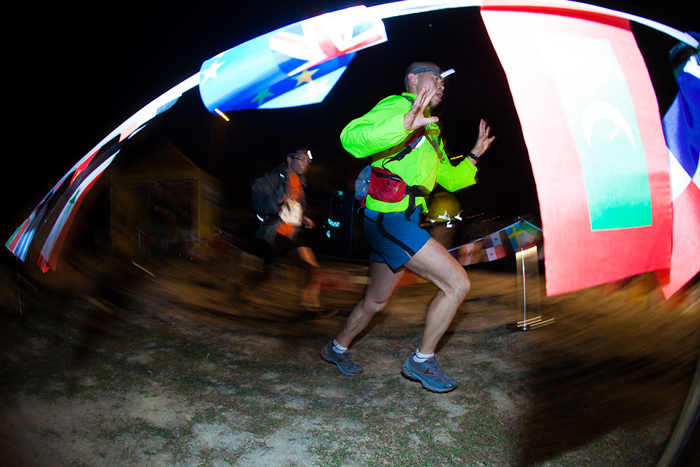
(5D mark II with fisheye lens and slow sync)

After 25 hours of photography, I thought it was time to break out the fisheye lens and try to get some shots with that, so it was a case of lying down on the floor underneath the small flags at the finish line, trying some rear sync flash and getting extremely close to the runners as they came across the line, this gave a dramatic effect which I like...similar to a lot of my styles of photography, i really believe the old saying "if its not good enough, your not close enough....".

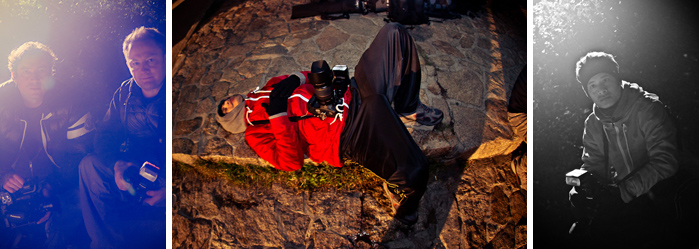
(James the videographer from Mededs with Gary, RJ taking a break and in action during the night)

In the end, we packed up our kit at first light on Sunday, and headed home, a great experience for us, made me reminisce of my army days being stuck out on a mountain all night, but its all part of the fun, great event, great people, and we hope we have done it justice with our images.  We look forward to next year, where we will ensure Starbucks has a takeaway truck parked up the top of Tai Mo Shan for us :-)

Thanks for taking the time to visit our blog, if you like our blog and website, please ‘like’ us on our public Facebook page and share this story with your friends with the Facebook and twitter links below.  You can also subscribe to our blog via the RSS link below.

F8 Photography provides commercial photography and training across Asia, with workshops on Street Photography and other photography and video training courses, more details can be found via the ‘courses and workshops’ link and upcoming events via the front page of our website.

Team Vibram photoshoot

This year we were asked to cover the Vibram HK100 ultra-marathon, which took place this weekend (blog post on that coming soon). A few weeks ago we met up with the Vibram tester team to do some marketing and advertising shots for Vibram China which were used for press release and upcoming Vibram trade shows in Beijing and all over the world.

We spent the day on the mountains above Hong Kong, with great moody skies which helped with our black and white photography, a few lights and some very fit Team Vibram members posing for us running up and down the hills and along the mountain sides.

All in all a great day out for us, yet another reason to love being a photographer - getting out into the fresh air with great scenery, meeting fantastic people and delivering some work that they are very happy with,   Its great when everything falls into place like it should.

The next blog post will show images from the HK100 event itself, both behind the scenes and the race - we are just recovering (as are the athletes I'm sure), as the race was a long long weekend, almost 25 hours non-stop photography....a mission in itself!  That will be coming very soon in the next few days, please check back to see that shortly.

In the meantime, here's a few images below from the test shoot with them:

Thanks for taking the time to visit our blog, if you like our blog and website, please ‘like’ us on our public Facebook page and share this story with your friends with the Facebook and twitter links below.  You can also subscribe to our blog via the RSS link below.

F8 Photography provides commercial photography and training across Asia, with workshops on Street Photography and other photography and video training courses, more details can be found via the ‘courses and workshops’ link and upcoming events via the front page of our website.


Spiders and Speedlights...using off camera flash

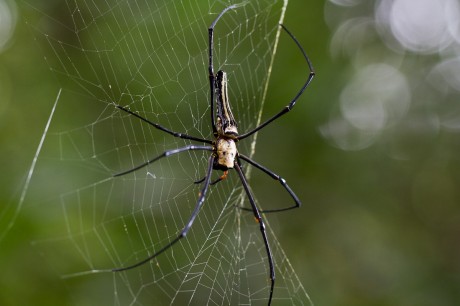
The last few days when I've been out jogging I found some BIG spiders hanging in the bushes on the mountain.... As scary as they are to me, I thought it would be kinda cool to take a few pics of them at some point.  I did a bit of research online to find out what kind of spiders they are, and it seems they are called Golden Orb Weaver Spiders, here's the (wikidpedia link if interested), they do have neurotoxin venom which is dangerous but not lethal to humans....here is an image showing the spider and how it gets it name from the golden orb you can see clearly at the base of its back.

Anyway, the purpose of this blog post is not a wildlife lesson, but more a quick insight into using speed-light flash (off camera) and how it can be used to enhance or help light a subject and how we balance the 'ambient' light.  One of our trainee assistant photographers called RJ is learning more about flash work and he also has a big interest in macro photography and wildlife so I thought he would be the perfect candidate to practice some flash techniques with these spiders and help him to learn flash balancing at the same time.  Everything to do with flash and balancing light applies exactly the same if you are photographing insects, humans, or anything else for that matter.

So, we set off on the trail, and as there had been a typhoon the day before, I was not optimistic about finding any spiders due to their webs having been broken up by the wind, but sure enough after 30 minutes we found loads of these monsters!  These critters look pretty hardcore to me and clearly aren't concerned with Typhoon 8 weather...

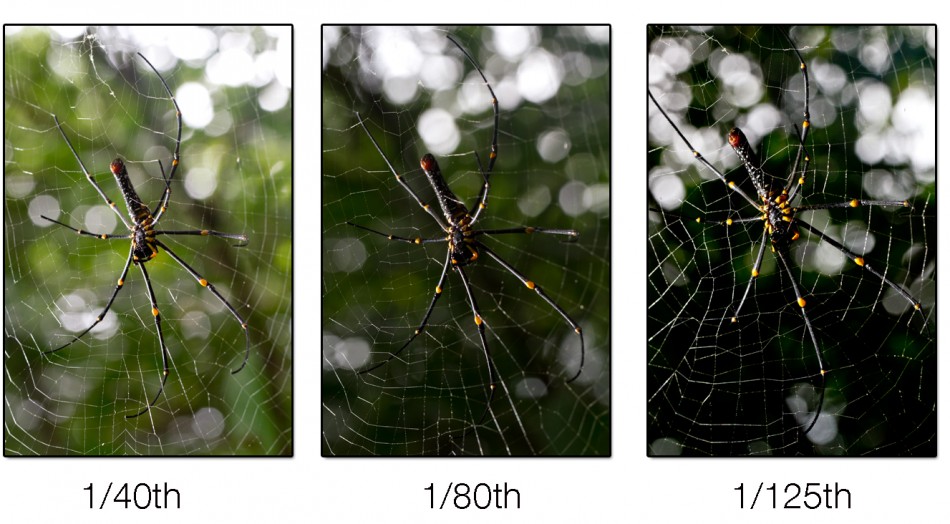
The idea of the trip out was to show that flash and ambient light can easily be controlled separately.  Once an exposure is attained, to get more light in the background (ambient light), all you need to do is adjust the shutter speed slower - to make the background darker you just do the opposite and adjust the shutter speed faster.

The first test shot RJ did on a caterpillar demonstrates a fast shutter speed (1/200th), which cancels out all of the ambient light (daylight/light source other than flash)...This caterpillar was in broad daylight but the effect achieved is show below. (bear in mind on most DSLR cameras you are still limited to maximum shutter speed of approx 1/200th of a second whilst using flash (will differ slightly for different camera models), otherwise the shutter will close before the flash has finished exposing and effectively chop your picture in half).  When using the flash on the camera, your camera will not let you shoot faster than its maximum 'sync speed' to help prevent this problem, unless you have high speed flash features enabled.

Once we found some of the big spiders, RJ tested out this theory again, firstly attaining a rough exposure with the flash and ambient light, and then adjusting only his shutter speed to effectively darken or lighten the background for different effects in each picture as shown below:

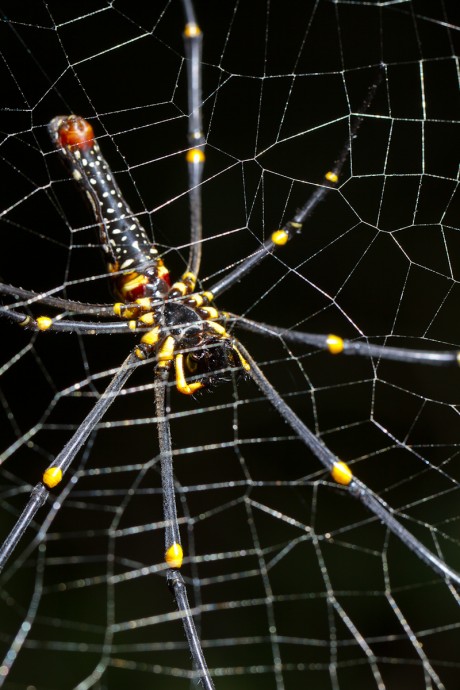
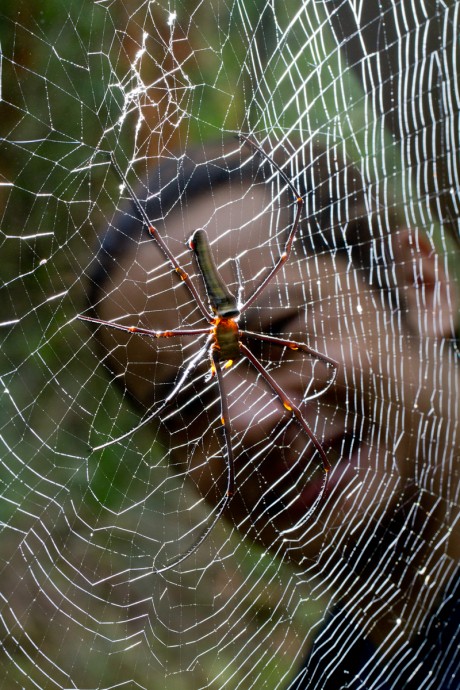
The other technique that I wanted to emphasize to RJ was using side lighting and back lighting with the flash....this can help give shape and texture to your subject and in this case really helped bring out the details in the web....if we were shooting portraits of people we could use this technique to emphasise shape, texture, hair details, etc, etc....its all the same idea, just applied to each subject how you like.

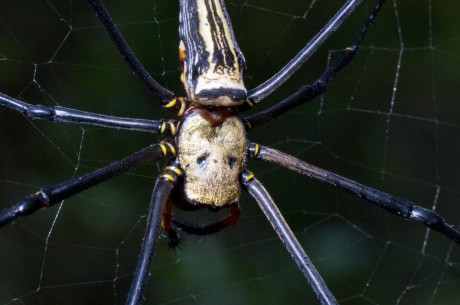
This next picture RJ shot shows a real close up of the back of the spiders head....we both agreed the damn thing looked like it was wearing the famous hockey mask that Jason wears in the 'Friday the 13th' horror movies...as if it wasn't already scaring us enough!....

Something we did in this picture as the flash was very close to the spider was to put some white tissue paper in front of the flash head which helps to soften the light like a 'mini-cloud' giving a diffused light effect...there are many props you can buy to achieve this effect, but especially for macro, sometimes a simple piece of tissue can do the same job!


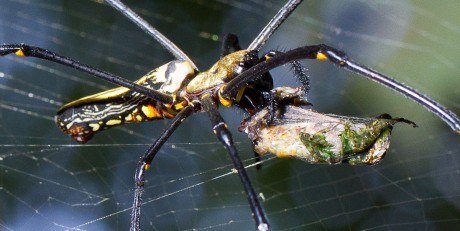
This last shot won't be too everybody's taste...but RJ found it interesting...to see this poor grasshopper looking insect had come to a very sticky end.....gives me goosebumps to see this close up....but again, the flash has really helped bring out the detail in the shot.

I hope this short post can be useful to anyone learning flash, it shows u can practice flash techniques on anything, doesn't need to be portraits, you can shoot anything at home or outdoors and learn these important techniques to balance flash with the ambient light.

Just remember, shutter speed will control your ambient light, and flash power can be controlled by the flash unit, bringing the flash closer or further away from the subject, or by adjusting your aperture (when using manual flash) to change the amount of light that reaches the subject from the flash (of course adjusting aperture will also effect ambient light).  Adjusting your ISO will effect everything, making the sensor more or less sensitive to light, therefore affecting all light sources in your scene.

If you found this post useful, please click the 'LIKE' button, maybe subscribe to our blog or other social media via the links below and please feel free to leave us your comments.